
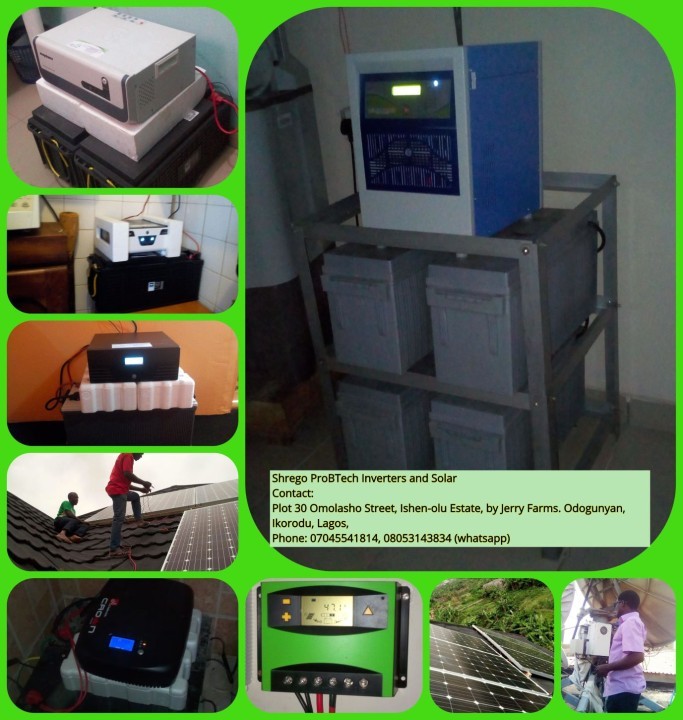
To repair an inverter transformer, identify the faulty components and replace them accordingly. Inverter transformers are an essential component of inverters, responsible for converting direct current (DC) into alternating current (AC).
When these transformers become damaged or faulty, it is crucial to repair them promptly to ensure the smooth function of the inverter. Repairing an inverter transformer involves identifying the problematic elements such as burnt coils, shorted windings, or broken wires, and replacing them with new components.
This process requires careful disassembly, testing, and reassembly of the transformer, ensuring proper connections and insulation. By following the correct repair procedures and using quality replacement parts, one can restore the functionality of the inverter transformer and revive the performance of the inverter system.

Credit: www.digikey.com
Diagnosing Inverter Transformer Issues
When it comes to repairing an inverter transformer, it is crucial to diagnose the issues accurately and efficiently. By identifying the root cause of the problem, you can determine the most effective repair strategy and ensure the smooth operation of your inverter. In this article, we will guide you through the diagnostic process, providing step-by-step instructions and tips for identifying common transformer issues.
Visual Inspection
The first step in diagnosing inverter transformer issues is to conduct a thorough visual inspection. Carefully examine the transformer for any obvious signs of damage or malfunction. Look for indications such as burn marks, charred wires, or loose connections. Inspect the transformer's casing for cracks or other physical deformities that may affect its performance. Pay close attention to the primary and secondary windings, as well as the core, as these are common areas where problems can occur.
Testing For Continuity
Continuity testing is an essential part of diagnosing transformer issues. This process involves checking whether there is an uninterrupted electrical path between different components of the transformer. To perform this test, you will need a multimeter with a continuity function.
- First, ensure that the transformer is disconnected from the power source and all associated circuits.
- Set your multimeter to the continuity mode.
- Touch one probe of the multimeter to one terminal of the primary winding and the other probe to the corresponding terminal of the secondary winding.
- If the multimeter beeps or indicates continuity, it means there is a connection between the primary and secondary windings. If there is no continuity, it suggests a fault in the transformer.
- Repeat this process for each set of primary and secondary winding terminals.
Measuring Resistance
Measuring resistance is another crucial step in diagnosing inverter transformer issues. This test helps determine whether the windings are properly functioning and whether there are any faults or short circuits present. To measure resistance, follow these steps:
- Disconnect the transformer from any power sources or circuits.
- Set your multimeter to the resistance mode.
- Touch one probe of the multimeter to one terminal of the primary winding and the other probe to the other terminal of the same winding.
- Note the resistance value displayed on the multimeter. If the resistance is significantly higher or lower than the expected value, it indicates a fault in the windings.
- Repeat this process for each set of primary and secondary winding terminals.
Checking Insulation
Insulation plays a vital role in the proper functioning of an inverter transformer. Inadequate or compromised insulation can lead to short circuits and other electrical faults. To check the insulation of the transformer, you can use an insulation resistance tester or a megohmmeter. The steps for checking insulation are as follows:
- Disconnect the transformer from any power sources or circuits.
- Set your insulation resistance tester or megohmmeter to the appropriate range.
- Connect one lead of the tester to the transformer's core and the other lead to the primary or secondary winding terminals.
- Activate the tester and observe the insulation resistance value displayed. If the resistance is too low, it suggests insulation breakdown or a fault in the transformer's insulation.
- Repeat this process for both the primary and secondary windings.
By performing these diagnostic tests, you can identify and address any issues with your inverter transformer. Remember to exercise caution and adhere to safety procedures when working with electrical equipment. If you are uncertain or uncomfortable with any part of the diagnostic process, it is best to seek assistance from a qualified professional.
Credit: www.linkedin.com
Repairing Inverter Transformer
Repairing an inverter transformer can be a challenging task, but with the right knowledge and techniques, it can be done efficiently. In this blog post, we will discuss some common issues that can arise with inverter transformers and the steps to repair them. By understanding the process of repairing a faulty inverter transformer, you can save both time and money by avoiding the need for a replacement.
Replacing Faulty Winding
The winding is a crucial component of an inverter transformer and can often be the source of many issues. If you suspect a faulty winding, follow these steps:
- Identify the specific winding that needs to be replaced by conducting a thorough inspection.
- Use a soldering iron to carefully remove the faulty winding from the transformer.
- Obtain a replacement winding that matches the specifications of the original winding.
- Securely solder the new winding in place, ensuring proper connections.
Repairing Damaged Insulation
Damaged insulation is a common cause of malfunctioning inverter transformers. Follow these steps to repair insulation issues:
- Thoroughly inspect the transformer for any signs of insulation damage, such as cracks or burning marks.
- Using a sharp knife or insulation stripping tool, carefully remove the damaged insulation.
- Once the damaged insulation is removed, clean the area with a soft brush to remove any debris.
- Apply a layer of insulating varnish or tape to the exposed area to restore the insulation.
Fixing Connection Issues
Connection problems can cause the inverter transformer to malfunction. Here are the steps to fix common connection issues:
- Inspect the connections on the transformer for any loose or damaged wires.
- If any loose wires are found, tighten them using pliers or a screwdriver.
- If any wires are damaged beyond repair, replace them with new ones.
- Ensure all connections are secure and properly insulated to prevent further issues.
Addressing Overheating Problems
Overheating can be a serious issue for inverter transformers and can lead to performance issues or even complete failure. Follow these steps to address overheating problems:
- Check for any obstructions around the transformer that may be blocking airflow.
- Clean the transformer and remove any dust or debris that may be causing overheating.
- If the cooling fan is not functioning properly, replace it with a new one.
- Ensure that the transformer is not overloaded and operating within its specified limits.
By following these steps and addressing common issues with inverter transformers, you can extend their lifespan and ensure optimal performance. Remember to take necessary safety precautions when working with electrical components and always consult a professional if you are unsure about any repair procedures.
Credit: gesrepair.com
Frequently Asked Questions On How To Repair Inverter Transformer
Can Inverters Be Repaired?
Yes, inverters can be repaired. Professional technicians can fix faults and restore their functionality. Repairs may involve replacing faulty components or repairing circuitry to ensure the smooth operation of the inverter. It is recommended to consult a qualified technician for any repair work on your inverter.
How Do You Fix A Tripped Inverter?
To fix a tripped inverter, first, check the circuit breaker and reset it if necessary. Next, inspect the electrical connections for any loose or damaged wires. If everything seems fine, try disconnecting and reconnecting the power source. Finally, if the issue persists, consult a professional for further troubleshooting and repair.
What Would Cause An Inverter To Stop Working?
Inverters may stop working due to various reasons, such as faulty wiring, overheating, low battery voltage, or internal component failure. Proper maintenance, regular inspections, and addressing these issues promptly can help prevent inverter failure.
How Do You Fix A Short Circuit In An Inverter?
To fix a short circuit in an inverter, first, switch it off to prevent further damage. Then, locate the short circuit by visually inspecting the wiring and components. Disconnect the power source and carefully repair or replace the damaged wires or components.
Finally, retest the inverter to ensure it is functioning properly.
Conclusion
Learning how to repair an inverter transformer is a valuable skill that can save you time and money. By following the step-by-step guide provided you can confidently diagnose and fix common issues that may arise with your inverter transformer.
Remember to prioritize safety at all times and consult a professional if needed. With practice and patience, you can effectively troubleshoot and restore your inverter transformer to optimal performance.


